

The Laravel framework gives us a lot of things out of the box. One of such things is Authentication. Authentication and authorization are very important when designing an application. When coding an API, you should be able to authenticate users (finding out who the user is), authorize users (allowing a user to only access specific routes based on some privileges. In this short tutorial, I am going to show how you can provide authentication for your API in Laravel. There are different ways of achieving this. Some of the ways are:
- Laravel Authentication (Laravel’s built in Authentication)
- Laravel guards: using a JWT library (We shall be using this in the tutorial)
- Laravel Socialite
- Laravel Passport
- Laravel Sanctum
In this tutorial, we shall be looking at the Token-based authentication. Token based authentication is very common these days. Used for authenticating web and mobile clients. It makes it very easy to work with devices across different platforms. When a user is authenticated, the token is stored on the user’s browser. Every request to protected routes by the user will require the token before permission is granted.
I shall be using the newly released Laravel 8 in this tutorial. Pre-requisite
- Basic knowledge of Laravel (Models, Controllers, Composer, Routes, Middlewares etc)
- Postman (We shall be using postman to test our API)
- Tymon jwt-auth package (We will install this using composer) Fresh Laravel App To get started, let us generate a fresh Laravel application. Navigate to a specific folder on your system that you want the application to reside in. Open your cmd, navigate to that folder, or use gitbash. Type the following to generate a fresh Laravel 8 application.
composer create-project — prefer-dist Laravel/laravel <name-of-app>
We shall be naming our app “api-auth”. So, the command above becomes:
composer create-project --prefer-dist Laravel/laravel api-auth
This will create a new project as “api-auth”.
After this, on the command line type cd api-auth to move into the app folder. Once in the folder, type php artisan serve to start your Laravel server. Open your browser and navigate to localhost:8000. You will see this.
Congratulations. Your Laravel is set up already.
2. Tymon jwt-auth package
Now, let us install this package in our application.
Type composer require Tymon/jwt-auth to install it. It will take some time though for the installation to complete.
After this, publish the config
php artisan vendor:publish — provider=”Tymon\JWTAuth\Providers\LaravelServiceProvider"
Next, generate secret keys
php artisan jwt:secret
This will generate our key. Copy the key generated and paste inside your .env file as follows
JWT_SECRET=WPxgtfaMzl6EHyxp5tP4gvhlxEfF37YeaBrsVa78Ar7rN2CmlfJn2M3Ky6jZ1nw2
(Note, this is not a constant. This was the key generated for me) Your jwt-auth package is set up already.
3. Models and migrations
Automatically, Laravel installation comes with a schema for creating a ‘users’ table in the database and User model.
The schema is found in Database\migrations\timestamp_create_users_table.php. However, we will be creating one more Model, which we will call Student with its corresponding migration and table.
<?php
use Illuminate\Database\Migrations\Migration;
use Illuminate\Database\Schema\Blueprint;
use Illuminate\Support\Facades\Schema;
class CreateUsersTable extends Migration
{
/**
* Run the migrations.
*
* @return void
*/
public function up()
{
Schema::create('users', function (Blueprint $table) {
$table->id();
$table->string('name');
$table->string('email')->unique();
$table->timestamp('email_verified_at')->nullable();
$table->string('password');
$table->rememberToken();
$table->timestamps();
});
}
/**
* Reverse the migrations.
*
* @return void
*/
public function down()
{
Schema::dropIfExists('users');
}
}
We will use mysql database in this application. Set up your database and edit your .ENV file.
To create the Student Model, type php artisan make:model Student -m. This will create a Student Model which you can find in App\Models. The -m flag is for creating a corresponding migrations table. If you navigate to Database\Migrations, you will see a file named as timestamp_create_students_table.php
<?php
use Illuminate\Database\Migrations\Migration;
use Illuminate\Database\Schema\Blueprint;
use Illuminate\Support\Facades\Schema;
class CreateStudentsTable extends Migration
{
/**
* Run the migrations.
*
* @return void
*/
public function up()
{
Schema::create('students', function (Blueprint $table) {
$table->id();
$table->string('name');
$table->string('course');
$table->timestamps();
});
}
/**
* Reverse the migrations.
*
* @return void
*/
public function down()
{
Schema::dropIfExists('students');
}
}
Now, we shall edit the ‘users’ and ‘students’ migration tables. So, edit the up functions in both tables. Remove fields you don’t want and add the ones you do. For this tutorial, we shall be doing something very basic.
a. createUsersTable.php (function up)
public function up()
{
Schema::create('users', function (Blueprint $table) {
$table->id();
$table->string('name');
$table->string('email')->unique();
$table->timestamp('email_verified_at')->nullable();
$table->string('password');
$table->rememberToken();
$table->timestamps();
});
}
b. createStudentsTable.php (function up)
public function up()
{
Schema::create('students', function (Blueprint $table) {
$table->id();
$table->string('name');
$table->string('course');
$table->timestamps();
});
}
Make sure you are connected to the database. Then run php artisan migrate to generate the users and students table in the database.
Navigate to the User model and fill as shown below
protected $fillable = [
'name',
'email',
'password',
];
Then, navigate to the Student model.
class Student extends Model
{
use HasFactory;
protected $fillable = ['name', 'course'];
}
The “fillable” attribute is an array containing all the fields of the table that can be filled by mass assignment. That is refers to sending an array to the model to directly create a new record in the database.
4. Routes and Controllers We will have two controllers. AuthController and StudentController. This is where all the logic of our application will be taking place. For our API, we will create a register end point. The route is where our requests are being directed to the correct controller.
In the routes folder, we will edit the api.php file
//Auth endpoints
Route::post('/register', [AuthController::class, 'register'])->name('register');
Route::post('/login', [AuthController::class, 'login'])->name('login');
Route::get('/logout', [AuthController::class, 'logout'])->name('logout');
Note that Laravel automatically prefix your api endpoints with the api term. For example, you can access the register endpoint from localhost:8000/api/register and not localhost:8000/register
Next, we will create Authcontroller and StudentController. Now, these controllers will be in charge of our application logic.
php artisan make:controller AuthController
php artisan make:controller StudentController.
We will first import the AuthController and StudentController in the file to be able to use those classes. (This is new in Laravel 8 though)
use App\Http\Controllers\AuthController;
use App\Http\Controllers\StudentController;
AuthController
<?php
namespace App\Http\Controllers;
use Illuminate\Http\Request;
use Illuminate\Support\Facades\Hash;
use App\Models\User;
class AuthController extends Controller
{
//
public function register(Request $request){
$user = new User;
$user->name = $request->name;
$user->email = $request->email;
$user->password = Hash::make($request->password);
$user->save();
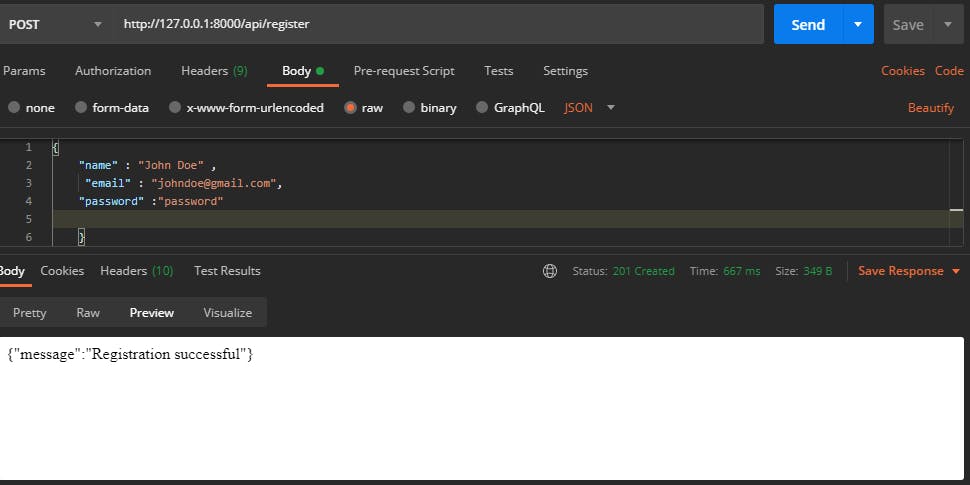
return response()->json([
"message" => "Registration successful",
], 201);
}
}
We had to import the User Model to be able to have access to the User from the controller. Also, we imported the Hash façade which provides a secured way for storing passwords in Laravel.
Next, we test our endpoint in Postman by registering a new user.
Before we go ahead with the login endpoint, we have to implement some changes to make our app generate the json web token. Firstly, in your User model, import the JWTSubject class, then implement its methods
<?php
namespace App\Models;
use Illuminate\Contracts\Auth\MustVerifyEmail;
use Illuminate\Database\Eloquent\Factories\HasFactory;
use Illuminate\Foundation\Auth\User as Authenticatable;
use Illuminate\Notifications\Notifiable;
use Tymon\JWTAuth\Contracts\JWTSubject;
class User extends Authenticatable implements JWTSubject
{
use HasFactory, Notifiable;
/**
* The attributes that are mass assignable.
*
* @var array
*/
protected $fillable = [
'name',
'email',
'password',
];
/**
* The attributes that should be hidden for arrays.
*
* @var array
*/
protected $hidden = [
'password',
'remember_token',
];
/**
* The attributes that should be cast to native types.
*
* @var array
*/
protected $casts = [
'email_verified_at' => 'datetime',
];
public function getJWTIdentifier(Type $var = null)
{
return $this->getKey();
}
public function getJWTCustomClaims(){
return [];
}
}
Function getJWTIdentifier allows you to change your identifier. For instance, instead of making it email, which is the default, you can make yours id or even name.
Function getJWTCustomClaims allows you to add more information to json token like roles. This can be very good in separating normal authenticated users from admins.
In, your config\auth.php file change the default guard from web to api. If you are working with the web you can leave the default as web. Then, up next, you can change your api driver to jwt. This way, you are telling Laravel to use the jwt package for its authentication.
<?php
return [

'defaults' => [
'guard' => 'api',
'passwords' => 'users',
],
'guards' => [
'web' => [
'driver' => 'session',
'provider' => 'users',
],
'api' => [
'driver' => 'jwt',
'provider' => 'users',
'hash' => false,
],
],
'providers' => [

'users' => [
'driver' => 'eloquent',
'model' => App\Models\User::class,
],
'passwords' => [

'users' => [
'provider' => 'users',
'table' => 'password_resets',
'expire' => 60,
'throttle' => 60,
],
],
'password_timeout' => 10800,
We will make use of this auth() guard in our login function.
public function login(Request $request){
$credentials = $request->only(['email','password']);
//Alternatively
/*$credentials = [
'email' => $request->email,
'password' => $request->password
];
*/
$token = auth()->attempt($credentials);
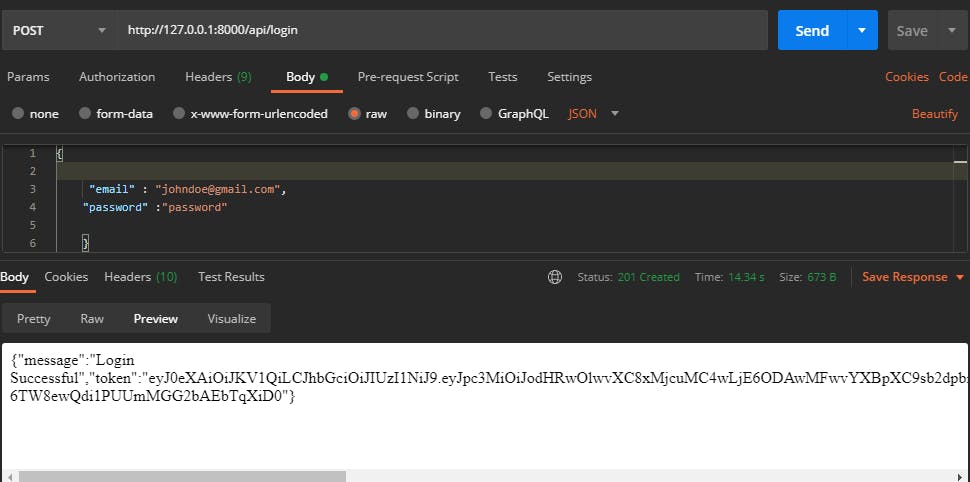
return response()->json([
"message" => "Login Successful",
"token"=> $token
], 201);
}
public function logout(){
auth()->logout();
return response()->json([
"message" => "Logout Successful",
], 201);
}
After, a successful login, a token is supplied. This token is used to access secured resources in your API
Note: This is a basic implementation, in real life applications, you can check if user records exist in the database first before they are allowed to attempt login. Also, you can log the user out using the logout method.
Student Controller.php
Let’s now work on our student endpoints
Route::get('/students', [StudentController::class, 'index'])->name('show.students');
Route::post('/students', [StudentController::class, 'store'])->name('create.student');
Route::get('/students/{id}', [StudentController::class, 'show'])->name('show.student');
Route::put('/students/{id}', [StudentController::class, 'update'])->name('update.student');
Route::delete('/students/{id}', [StudentController::class, 'delete'])->name('delete.student');
<?php
namespace App\Http\Controllers;
use Illuminate\Http\Request;
use App\Models\Student;
class StudentController extends Controller
{
public function __construct(){
$this->middleware('api', ['except' => ['index']]);
}
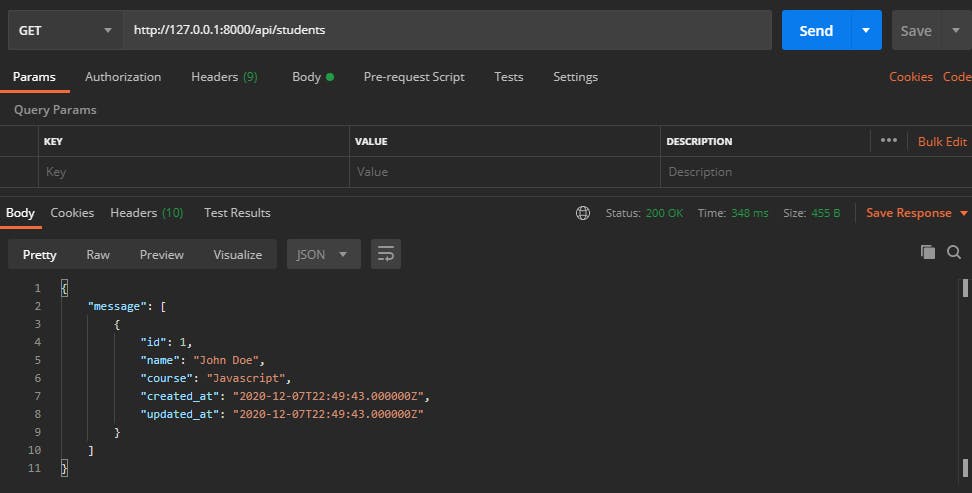
public function index(){
$students = Student::orderBy('id','desc')->get();
return response()->json([
"message" => $students
], 200);
}
public function store(Request $request){
if (auth()->check()){
$student = new Student;
$student->name = $request->name;
$student->course = $request->course;
$student->save();
return response()->json([
"message" => "New Student Created",
"success" => $student
], 201);
}else{
return response()->json([
"message" => "Access Denied. Please login",
], 403);
}
}
public function show($id=null){
if(auth()->check()){
$student = Student::where('id', $id)->first();
if($student){
return response()->json([
"message" => "Student with ID ". $id ,
"success" => $student
], 200);
}
else{
return response()->json([
"message" => "Student not found"
], 404);
}
}else{
return response()->json([
"message" => "Access Denied. Please login",
], 403);
}
}
public function update($id=null, Request $request){
if(auth()->check()){
$student = Student::where('id', $id)->first(); //Or find(id);
if($student){
$student->name = is_null($request->name) ? $student->name : $request->name;
$student->course = is_null($request->course) ? $student->course : $request->course;
$student->save();
return response()->json([
"message" => "records updated successfully",
"success" => $student
], 204);
}else{
return response()->json([
"message" => "student not found"
], 404);
}
}else{
return response()->json([
"message" => "Access Denied. Please login",
], 403);
}
}
public function delete($id = null){
if(auth()->check()){
$student = Student::find($id);
if($student){
$student->delete();
return response()->json([
"message" => "Student deleted"
], 404);
}else{
return response()->json([
"message" => "Student not found"
], 404);
}
}else{
return response()->json([
"message" => "Access Denied. Please login",
], 403);
}
}
}
From what we can see in the StudentController above, only the /students GET endpoint can be accessed without being logged in. Others can only be accessed by authenticated users i.e using the json web token to make requests.
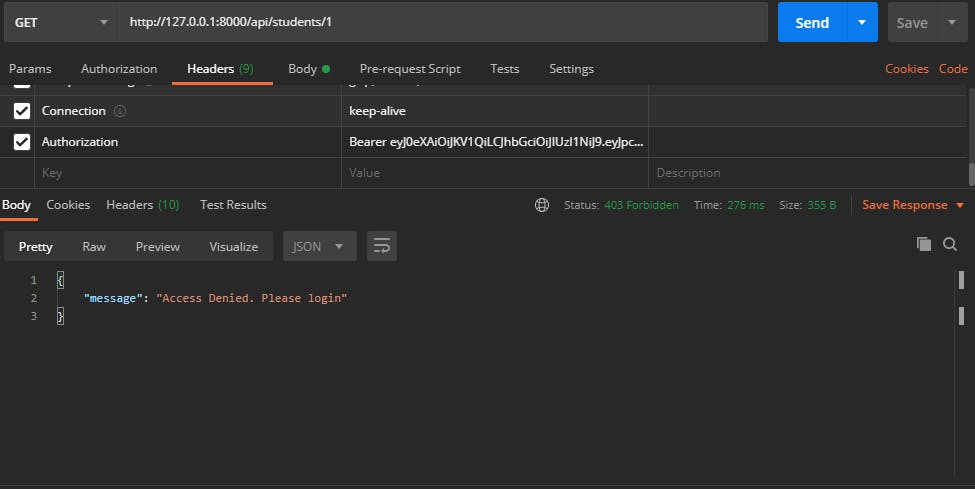
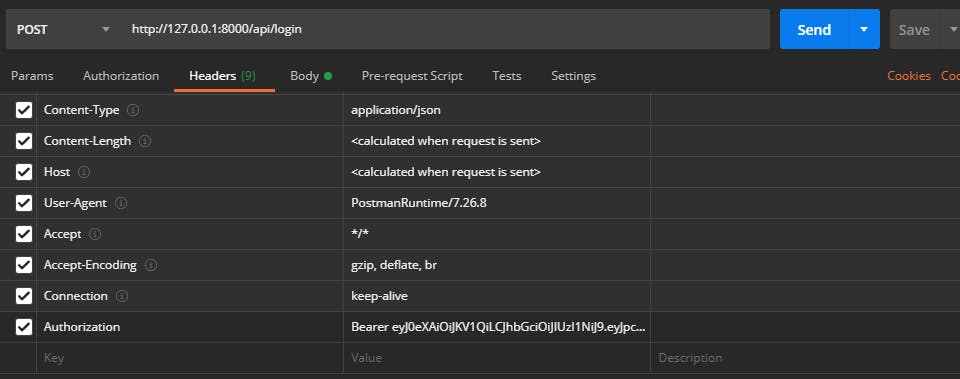
To access routes that require authentication, we have to login and then use the generated token in the authorization header to make requests.
Type ‘Bearer’, give a space, then paste the token. After that you can then make your requests
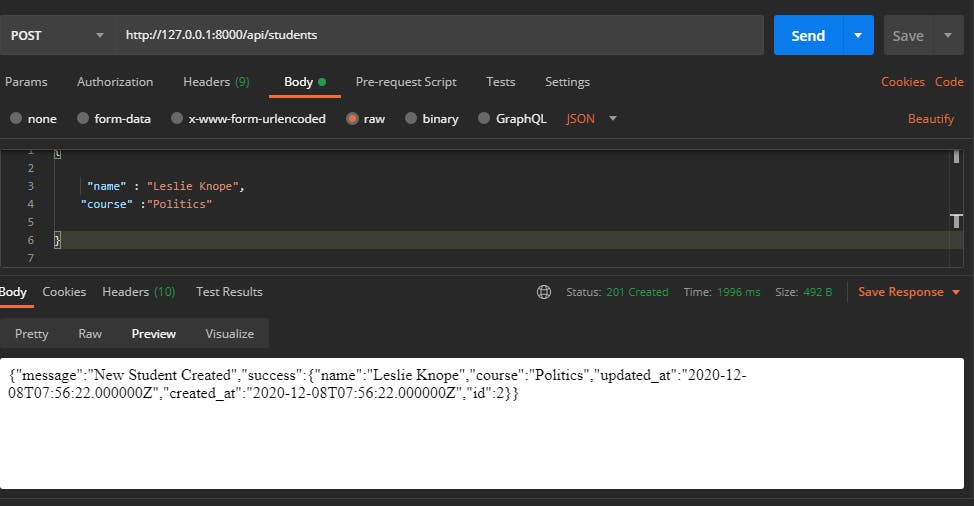
That’s it. You can basically perform all operations as you would normally, only that token should be supplied to authenticated endpoint. Thanks for reading.