Install and run Laravel application on a remote server (Part A)
Setting up a remote server


Table of contents


No headings in the article.
In this tutorial, you will learn how to install, deploy and run your Laravel application on a remote server. Basically, you will learn how to install a Laravel application on a “blank” remote server, configure and successfully run the application. Note that the application can be installed on any virtual server (e.g AWS EC2 instance, Azure VMs or other Vms such as DigitalOcean Droplets). In this tutorial, I will use a DigitalOcean droplet which is a Linux-based virtual machine. Linux images are also available on AWS (EC2) and Azure VMs. This tutorial will be divided into 2 parts. Firstly, you will learn how to set up and have access to a remote server. Secondly, you will also learn how to install a Full stack Laravel application on this server. This tutorial in this series will focus on the former.
Setting up a remote server
Like I stated above, in this tutorial, we shall be using DigitalOcean. It is easy to set up and also it is more suitable for a small application like ours. You will also learn how to configure your remote server on AWS EC2 instance in a later tutorial. (Follow me to get this tutorial when it drops)
So, to configure or set up your remote server on DigitalOcean, follow the simple steps below
Note: this tutorial is not an advert for DigitalOcean
1. Register and login to your DigitalOcean Account
Create a fresh DigitalOcean account and login into the account. On signing up, DigitalOcean gives you a free credit of up to $100 which you must use within 60 days trial period. This should be enough for you to build your project. You can also access other DigitalOcean's infastructure services with this free trial.
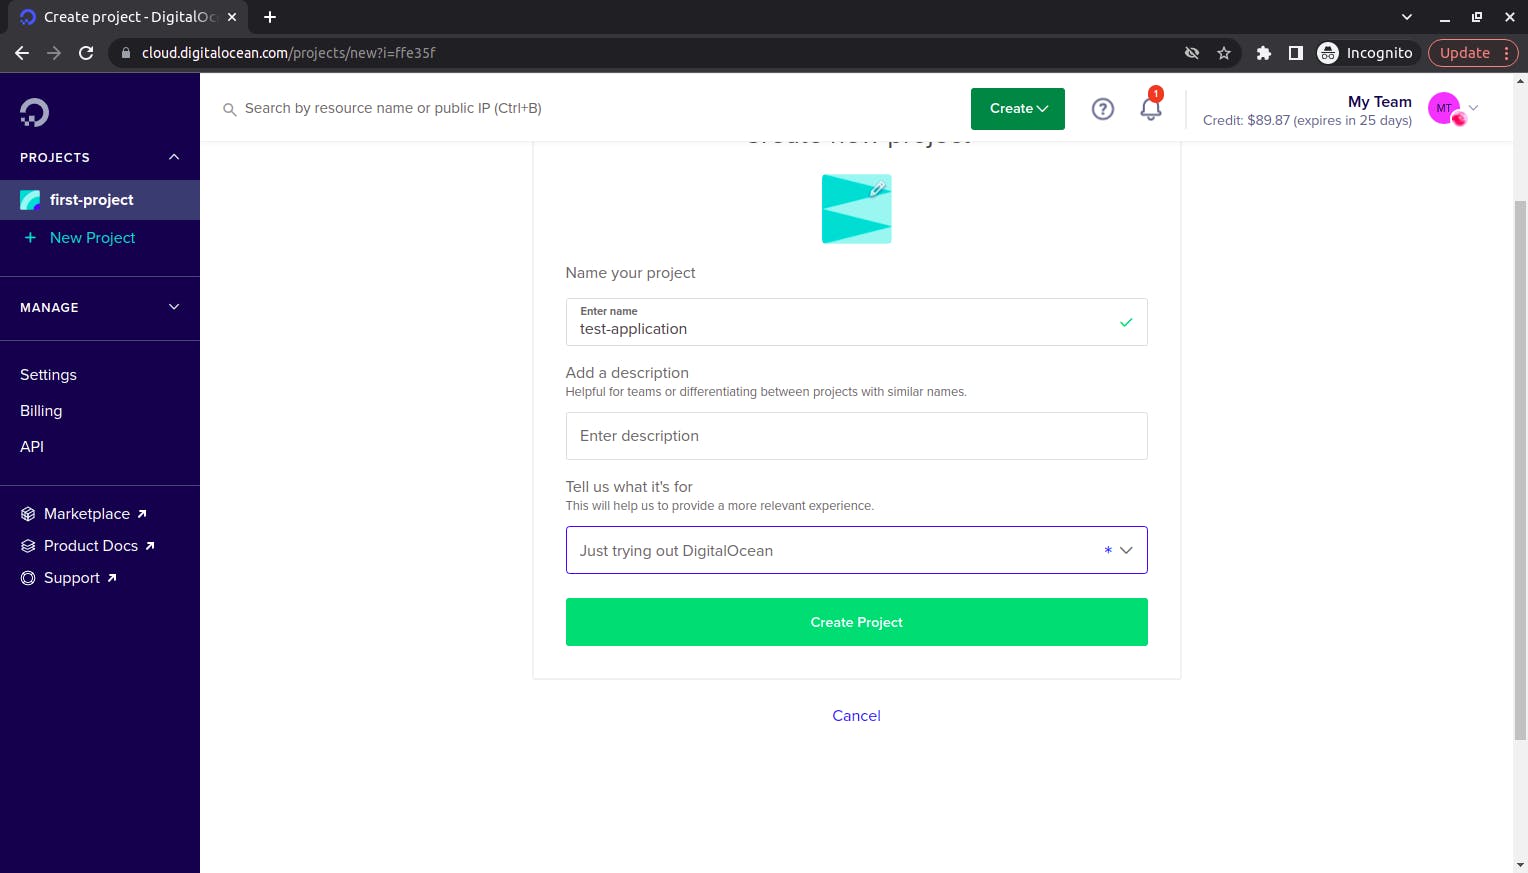
2. Create a new project
By default, DigitalOcean creates a default "first-project" for you. Here I named my created project "test-application". You can name your project whatever you want.
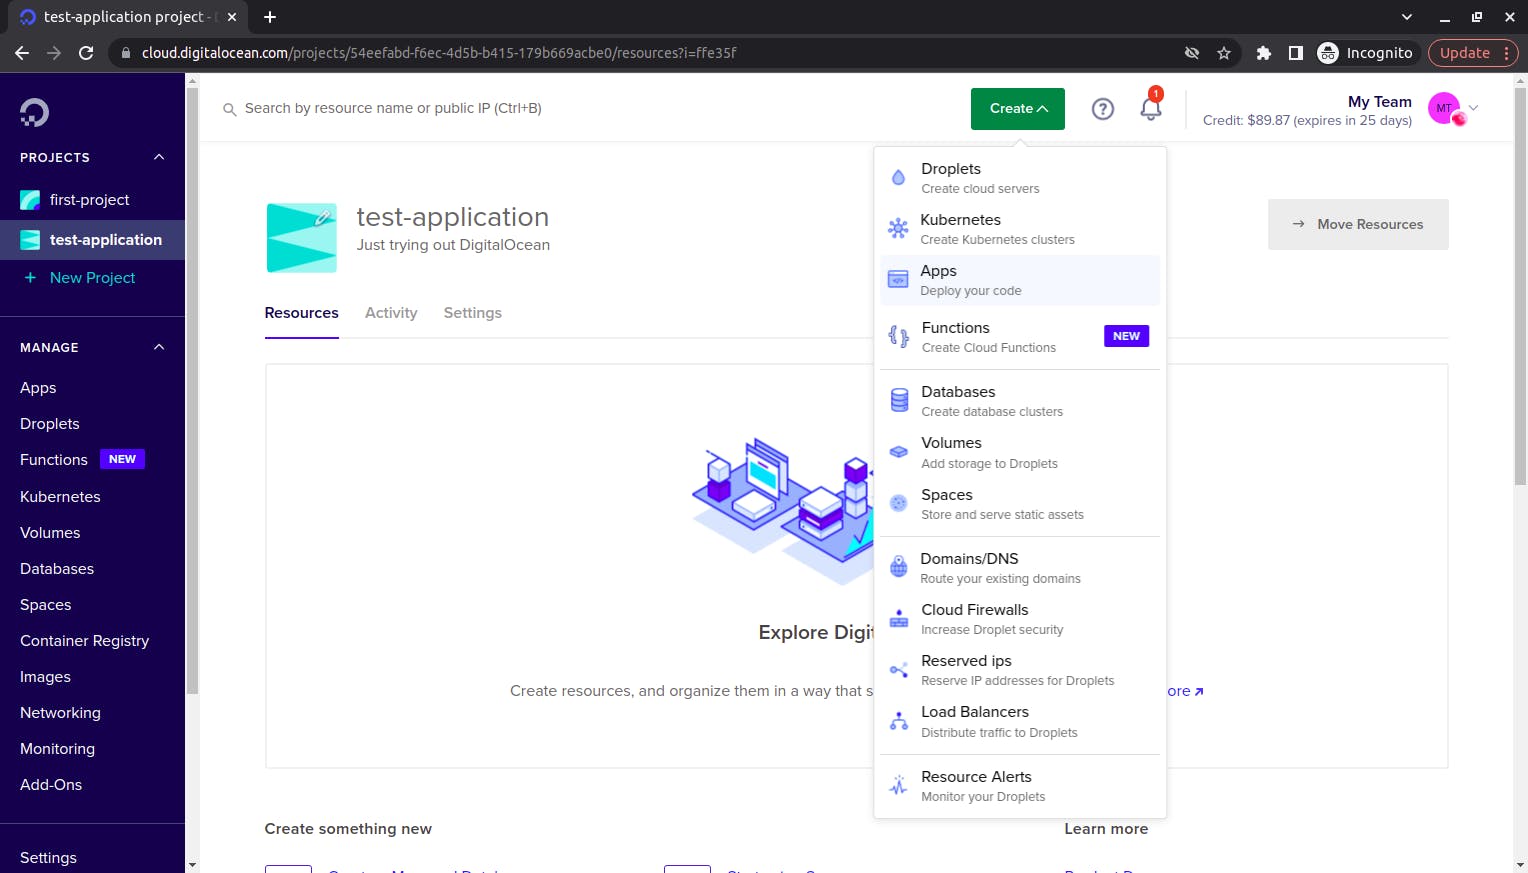
3. Create a new droplet
At the top right corner, click on the green "create" button and select "droplets". This takes you to the page where you configure the newly created droplet. (Linux based virtual machines)
4. Choose an image
Next, you have to choose an image for your droplet. Note: A server image is a disk image created from a running server instance. I will use Ubuntu 20.04 (LTS). You can go ahead and use the same
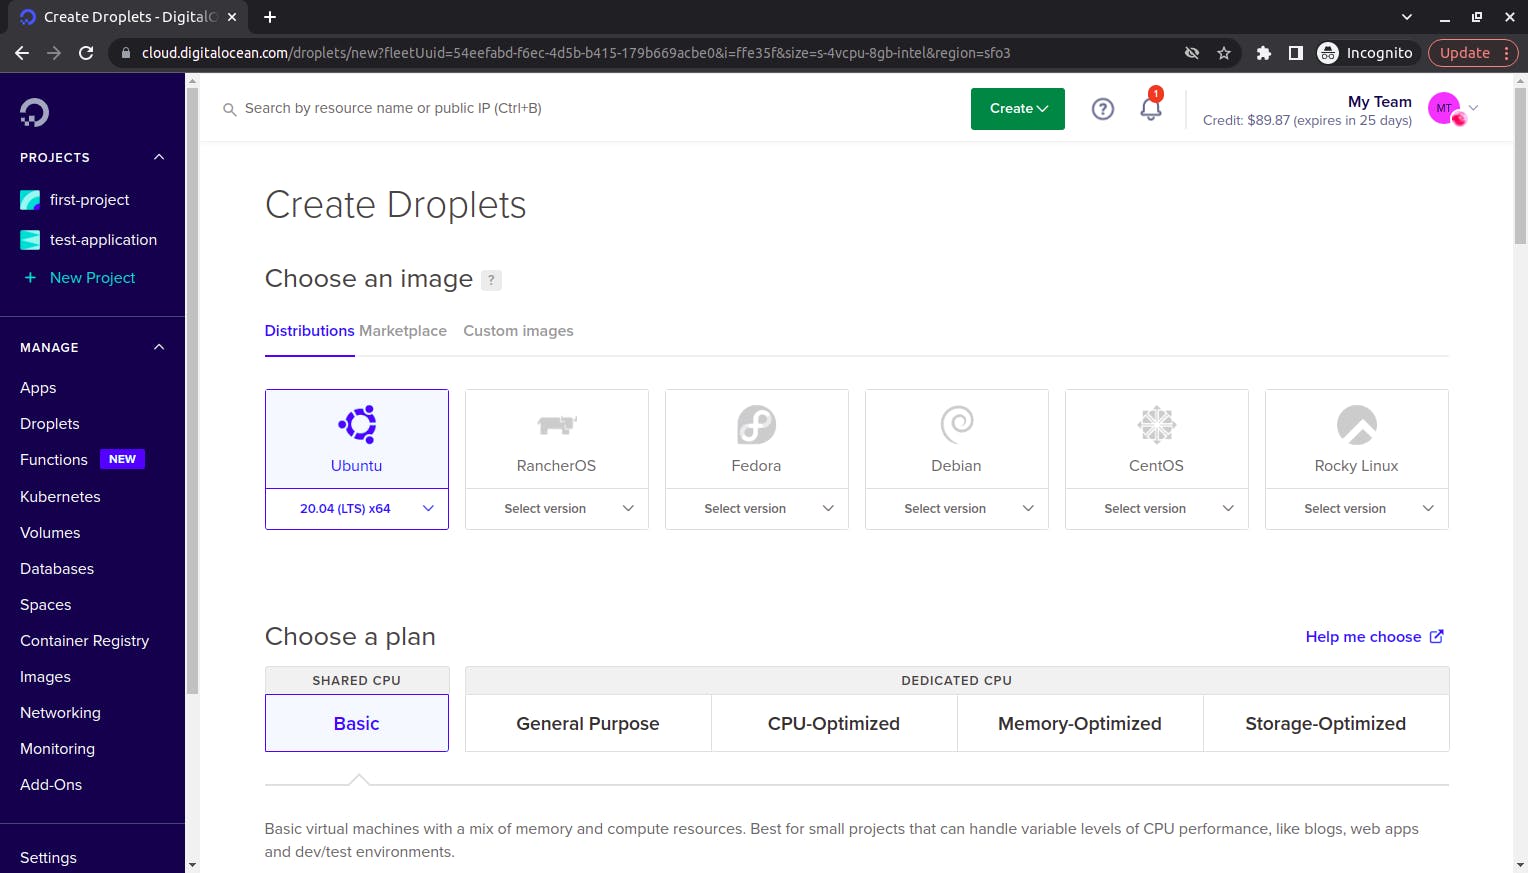
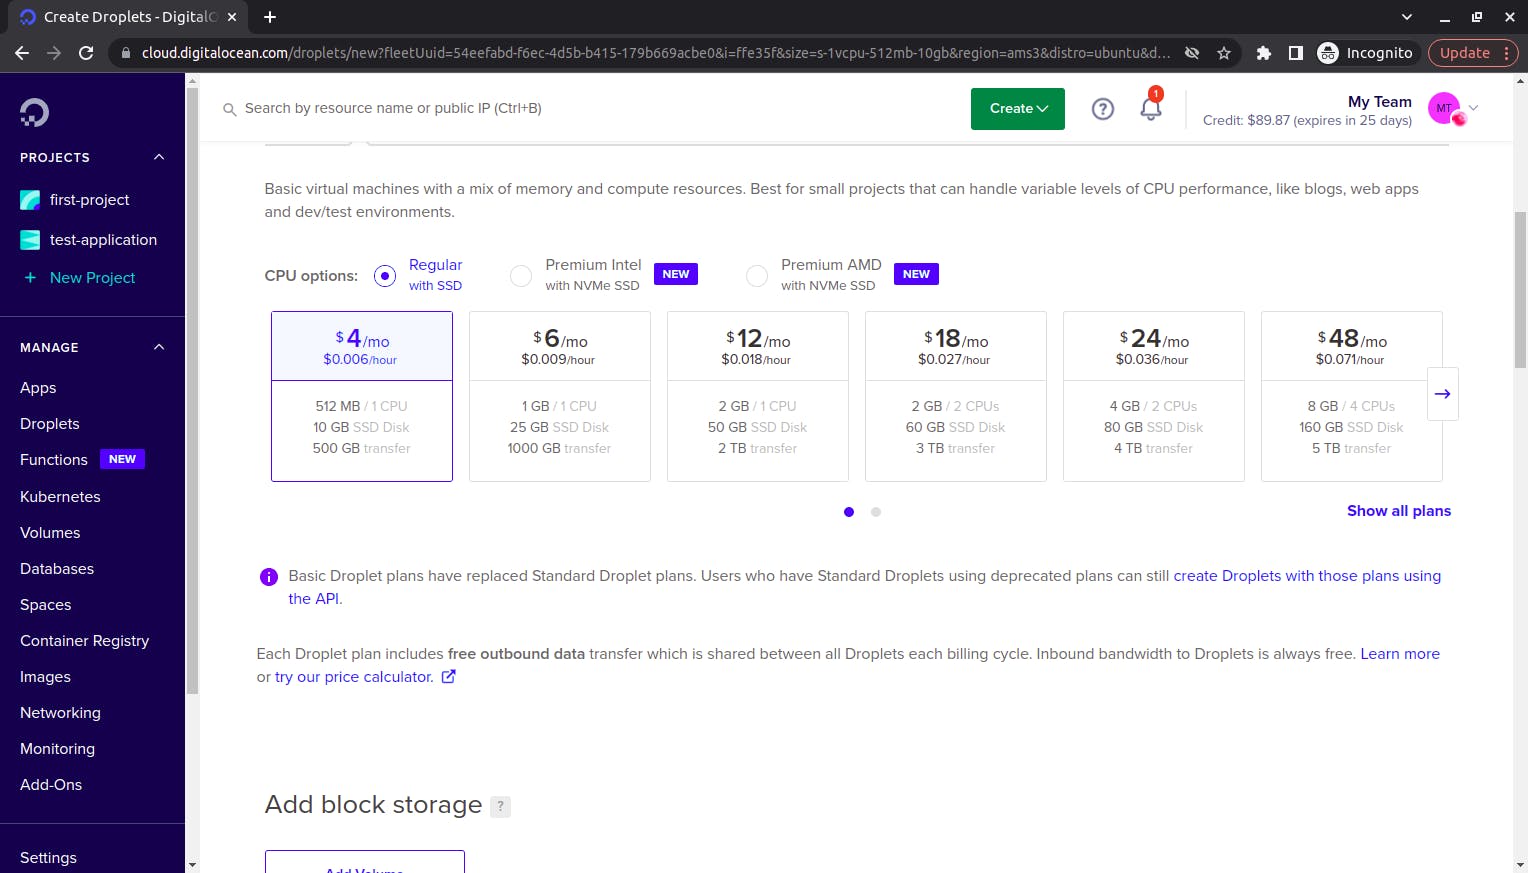
5. Choose CPU option
For the CPU option, you can go for the "Regular with SSD". This is very good for small applications or test applications such as this. You can simply choose the lowest plan as shown below for your application or choose another one that you like as long as DigitalOcean permits.
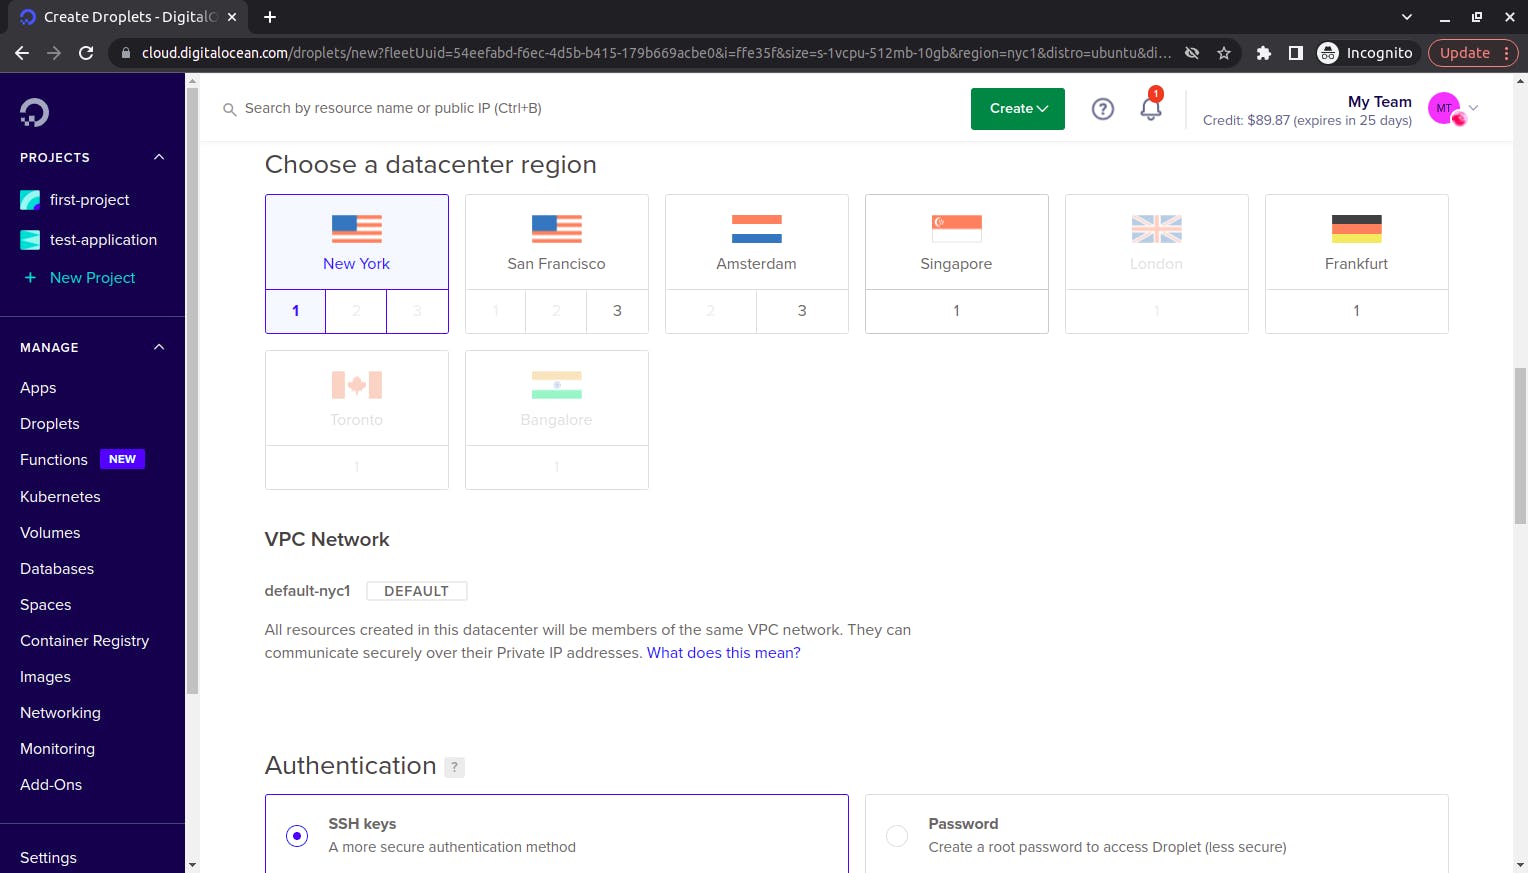
6. Select Datacenter Region
You can select a region where DigitalOcean has a Datacenter. Most of the times, there are a lot of factors that determine the datacenter you'd choose for your projects. Location (proximity to you and your target audience / market), reliability and security among others are some of these factors. For this test application, these factors are not that applicable. So, you can go ahead and choose any of the datacenters available. I will choose Newyork for this tutorial
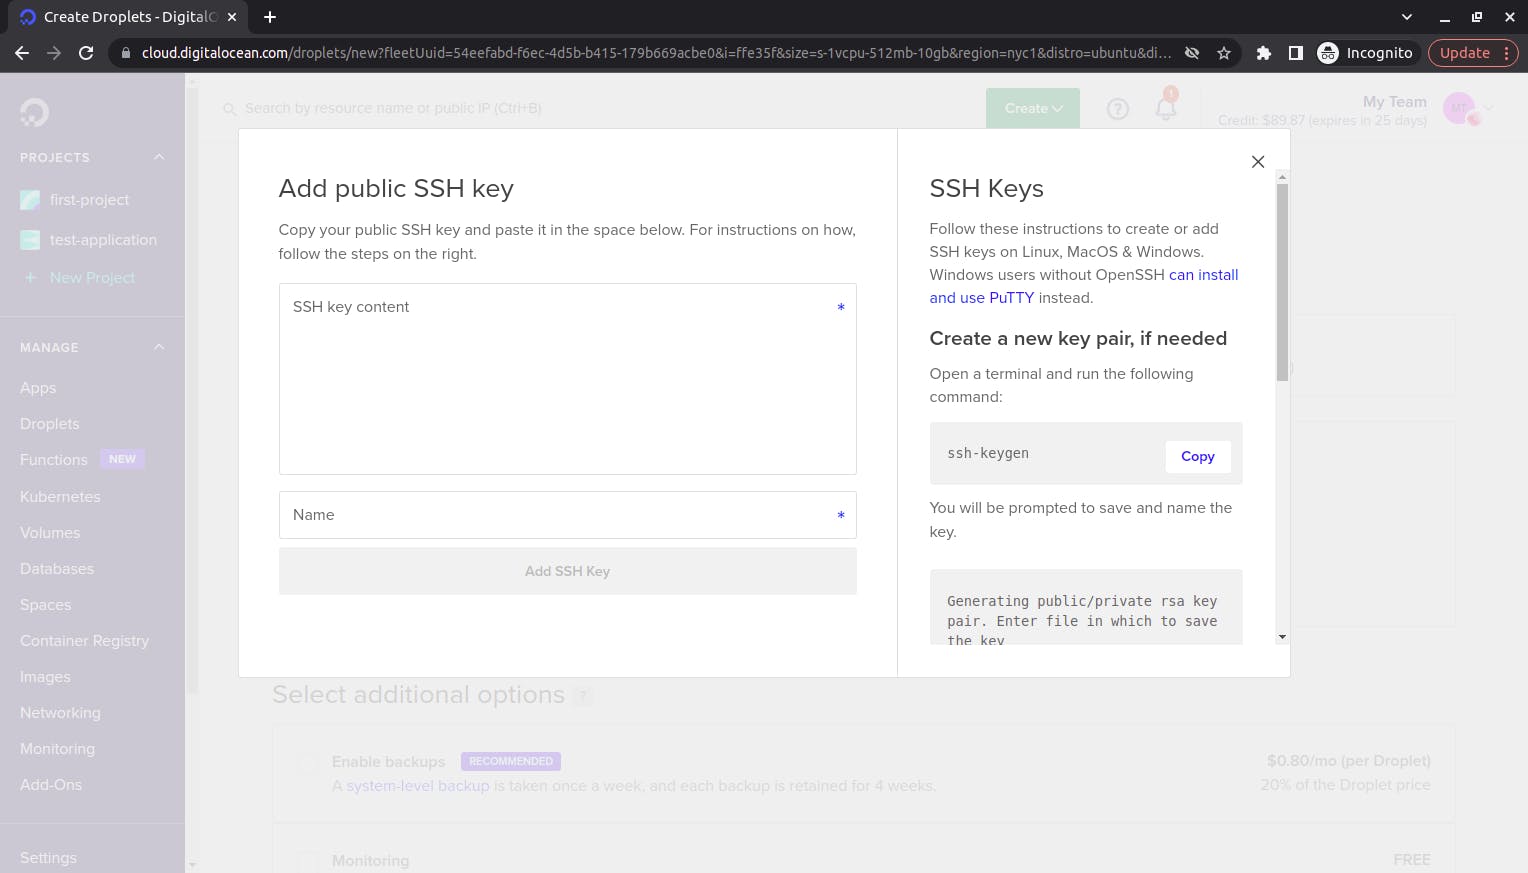
7. Add SSH keys
After creating your droplet, you will need to have access into it. For this you can either use password access or SSH access. For better security, I will advise you to opt for the SSH access. In this case, you have to supply your SSH keys. If you are on a MAC or Linux local computer, you can generate your SSH key as follows. For window users, you can use PUTTY.
For Mac and Linux Users
a. Type "ssh-keygen" into your command line
b. Enter file in which to save the key (/Users/USER/.ssh/id_rsa):
c. After being asked to save the name and key, you will be prompted to create and confirm a passphrase for the key.
d. Copy the contents of the .pub file using the command cat ~/.ssh/id_rsa.pub. Paste the content on the SSH key content field
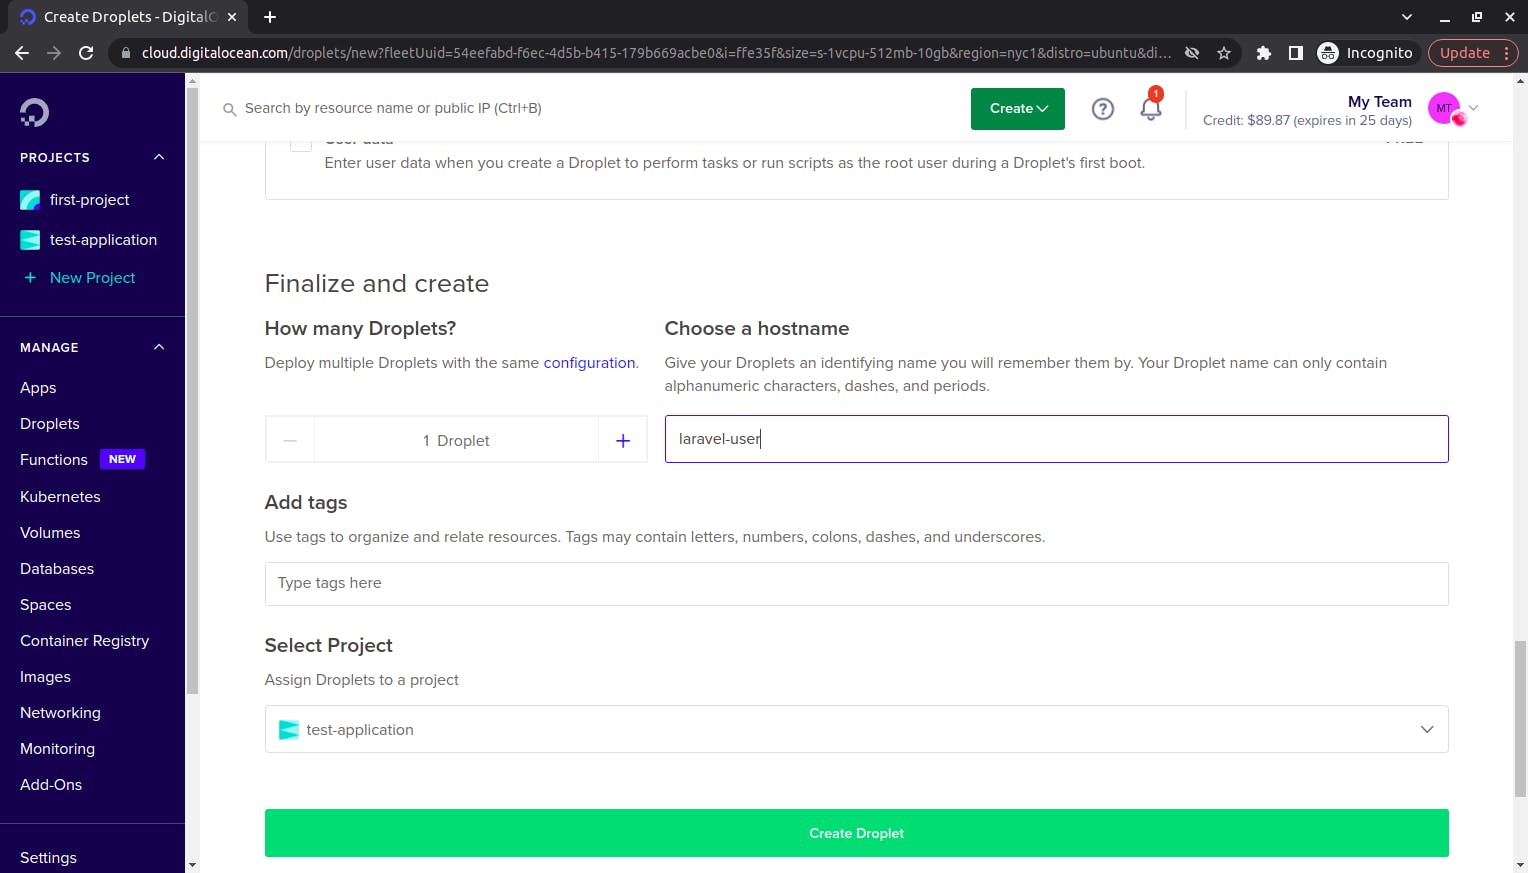
8. Choose hostname
You have to select a hostname. A hostname is basically the name of your server. You can name it whatever you want. You can name it after your business, your name or a Greek God. For this application, I will name the server "laravel-user". This name helps distinguish one server instance from the other. After selecting a hostname, click on the "create droplet" button to finally create the droplet.
9. SSH into the server
After creating the droplet, wait for a little time for the droplet to be fully "assembled". After this is done, you will notice the droplet has been assembled with the name you gave it, and an additional IP address has been assigned to the droplet. An IP address is a unique address that identifies a device on the internet or a local network. In this case, the IP address is the unique address through which our server instance is identified.
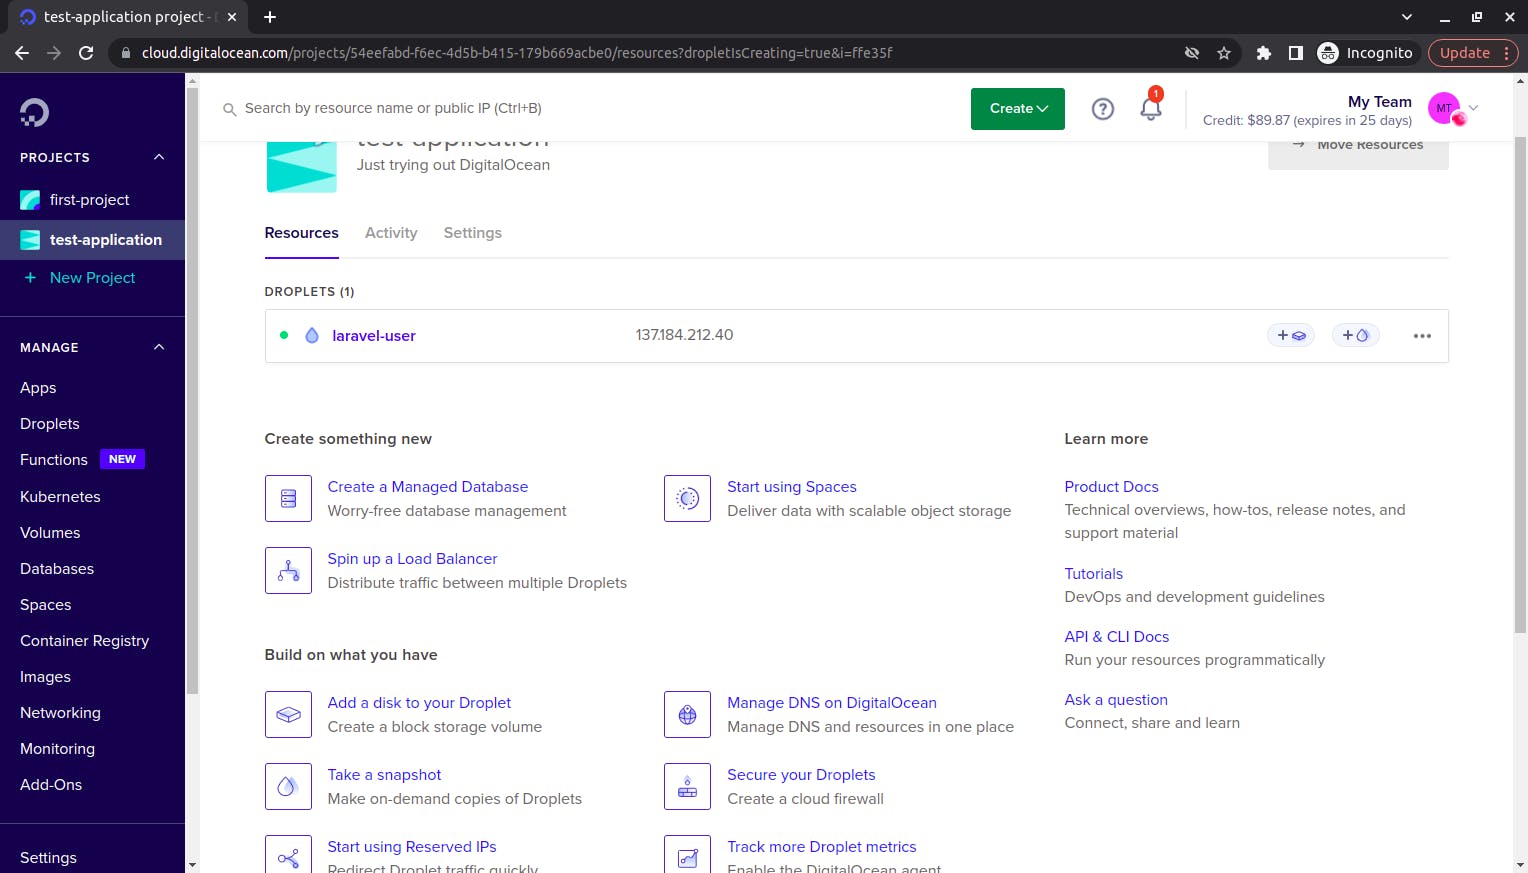
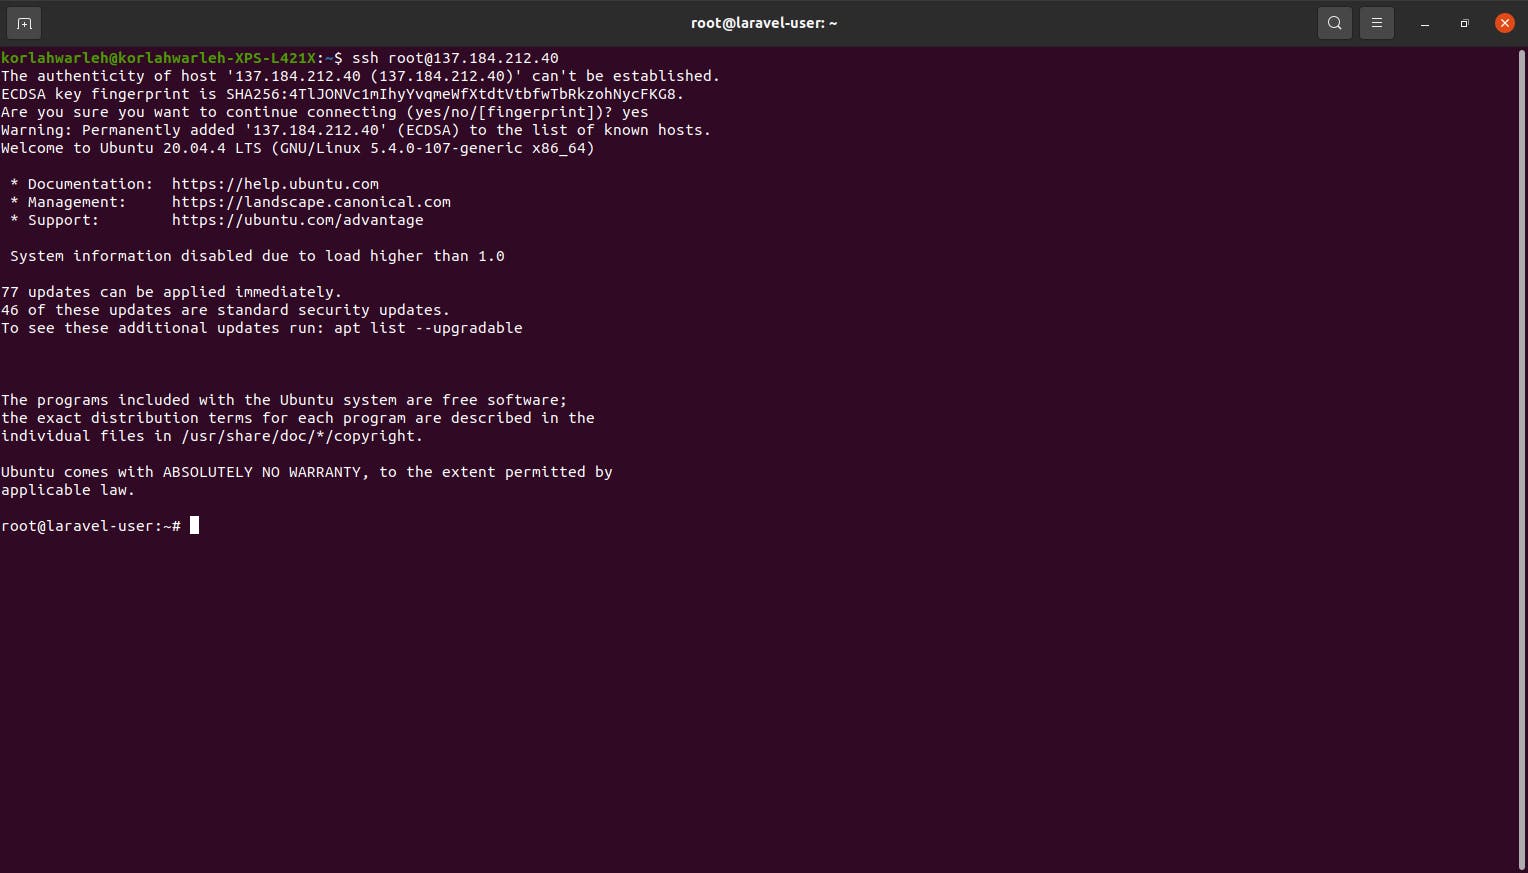
Copy the IP address, and move to your system terminal or CMD. SSH into the server using the command below.
ssh root@[COPIED_IP_ADDRESS]
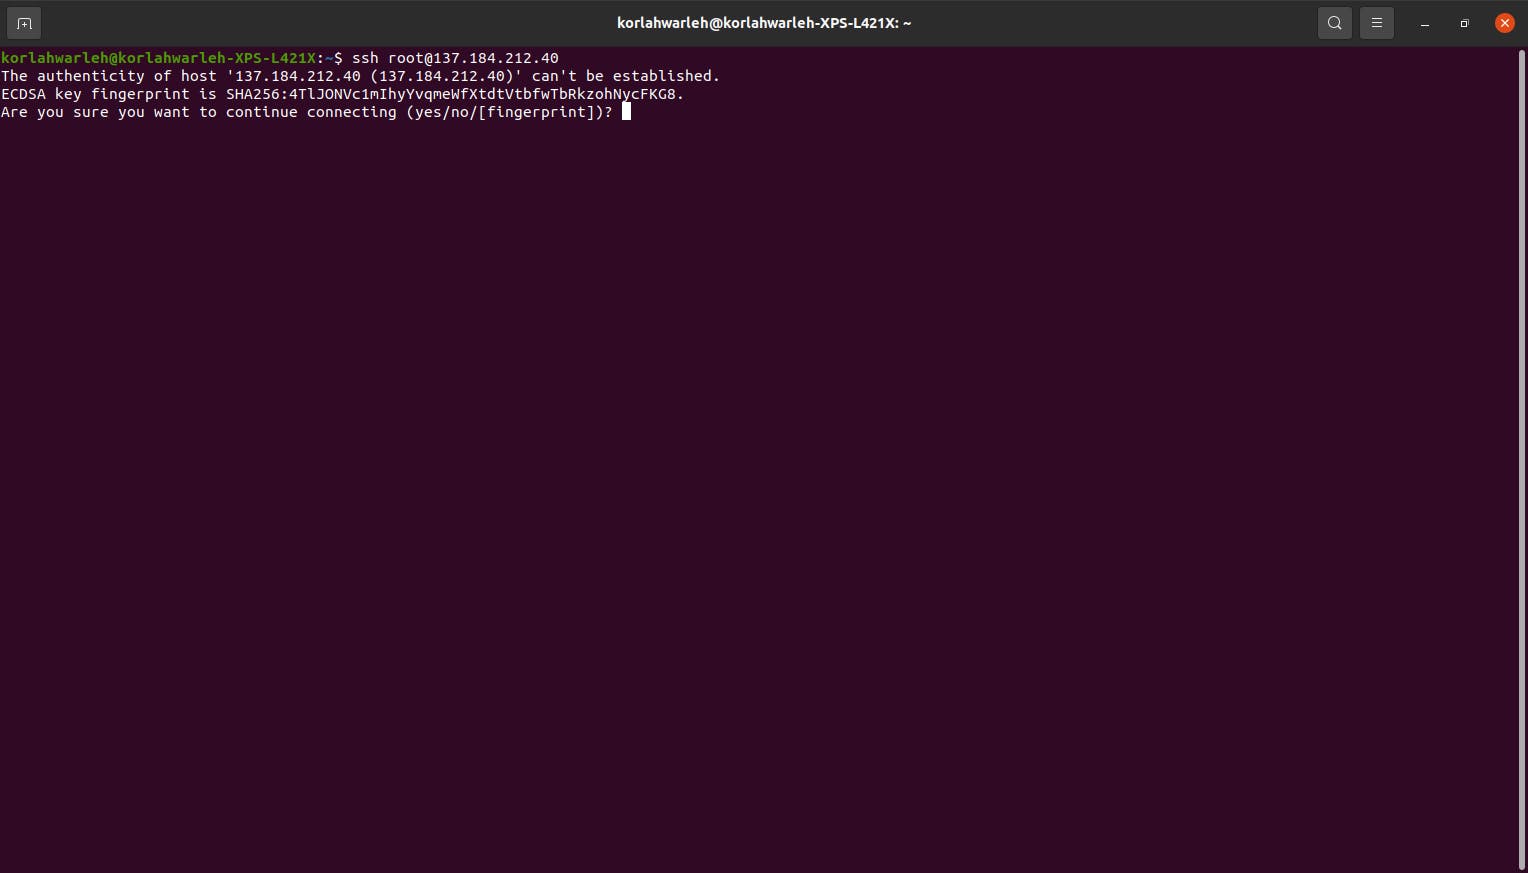
Connect to the IP address via ssh
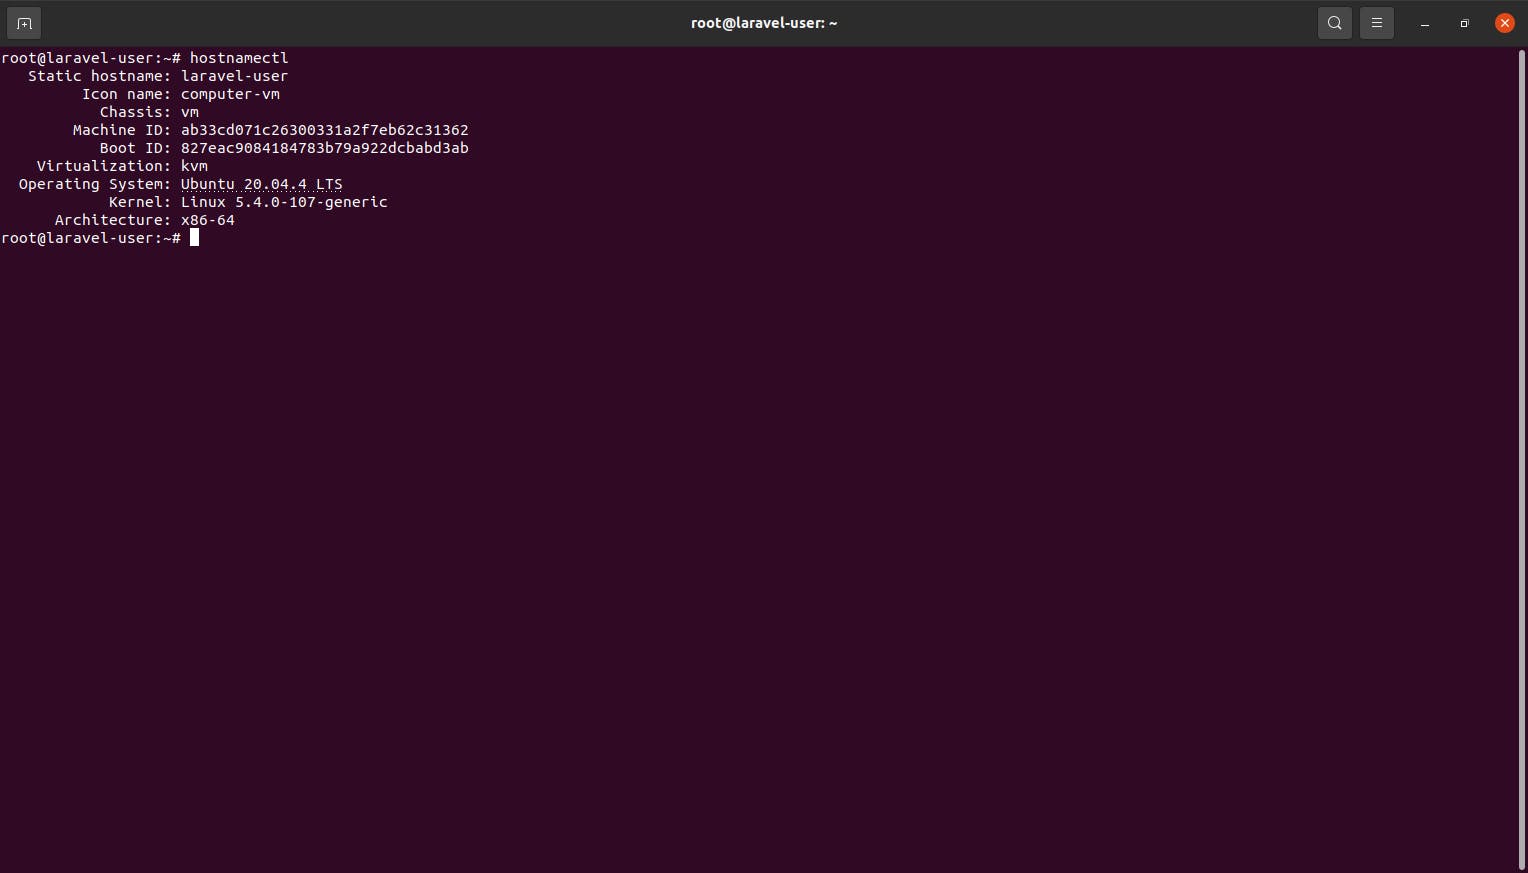
10. Verify Connection
To verify your instance and Linux version / distribution, you can use the command below. This command will also give you some information about your virtual machine.
hostnamectl
Now that your server instance have been properly setup, You can now proceed to the second part of this tutorial, where you get to install your Laravel application on this server instance and access the application on the web via the IP address.